BfA: Die Entwickler über das Rätsel des Schwarmbewusststeins
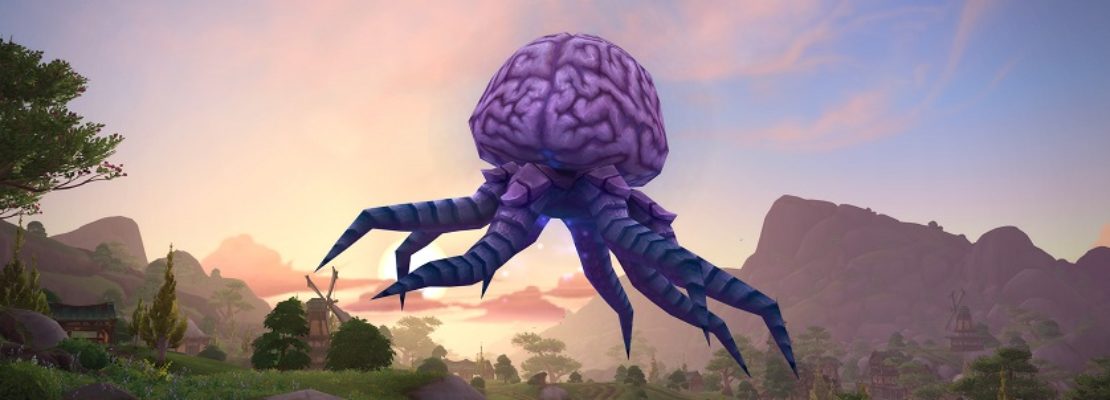
Interessanterweise veröffentlichten die für die Entstehung von Patch 8.1: Tides of Vengeance zuständigen Entwickler von Blizzard Entertainment in der vergangenen Nacht einen sehr informativen neuen Blogeintrag auf ihrer nordamerikanischen Communityseite, der noch einmal ganz genau zusammenfasst, wie Spieler eigentlich das bereits vor einigen Wochen von der Secret Finding Discord Community ausfindig gemachte versteckte Reittier ![]() Das Schwarmbewusstsein erhalten können. Dabei erklären die Entwickler in diesem Beitrag allerdings nicht einfach nur die zur Freischaltung dieser Belohnung notwendigen Schritte, sondern sie gehen auch noch häufig darauf ein, warum sie sich für bestimmte Rätsel entschieden haben und wie genau die einzelnen Herausforderungen entstanden sind. Da die verantwortlichen Entwickler sich eher selten zu den Hintergründen der in World of Warcraft vorhandenen Inhalte äußern, sollten diese Abschnitte des Blogeintrags besonders interessant für einen Großteil der Leser sein. Solltet ihr jetzt also erfahren wollen, wie genau die Freischaltung des
Das Schwarmbewusstsein erhalten können. Dabei erklären die Entwickler in diesem Beitrag allerdings nicht einfach nur die zur Freischaltung dieser Belohnung notwendigen Schritte, sondern sie gehen auch noch häufig darauf ein, warum sie sich für bestimmte Rätsel entschieden haben und wie genau die einzelnen Herausforderungen entstanden sind. Da die verantwortlichen Entwickler sich eher selten zu den Hintergründen der in World of Warcraft vorhandenen Inhalte äußern, sollten diese Abschnitte des Blogeintrags besonders interessant für einen Großteil der Leser sein. Solltet ihr jetzt also erfahren wollen, wie genau die Freischaltung des ![]() Das Schwarmbewusstseins abläuft oder was die Verantwortlichen sich bei der Arbeit an diesem Rätsel gedacht haben, dann kann ich euch nur raten, den folgenden Blogeintrag der Entwickler aufmerksam durchzulesen.
Das Schwarmbewusstseins abläuft oder was die Verantwortlichen sich bei der Arbeit an diesem Rätsel gedacht haben, dann kann ich euch nur raten, den folgenden Blogeintrag der Entwickler aufmerksam durchzulesen.
The Not So Secret Life of the Hivemind
Introduced in Tides of Vengeance was yet another series of puzzles from the Mind-Seekers, again drawing players from around the world to work together to find the elusive Hivemind mount to add to their collections—and earn some bragging rights for unraveling the machinations of the minds behind the madness.
Let’s pull back the curtain once more to reveal the design of each puzzle, and explore how the community solved them.
Warning: Spoilers ahead! If you wish to solve this riddle for yourself, DON’T READ ON! You have been warned
The Talisman of True Treasure Tracking
When trying to create puzzles that are challenging but also able to be beaten by large groups of people working together, we have to dig deep and come up with some really obscure and subtle clues. We mean really subtle. The start of this quest is a great example of this.
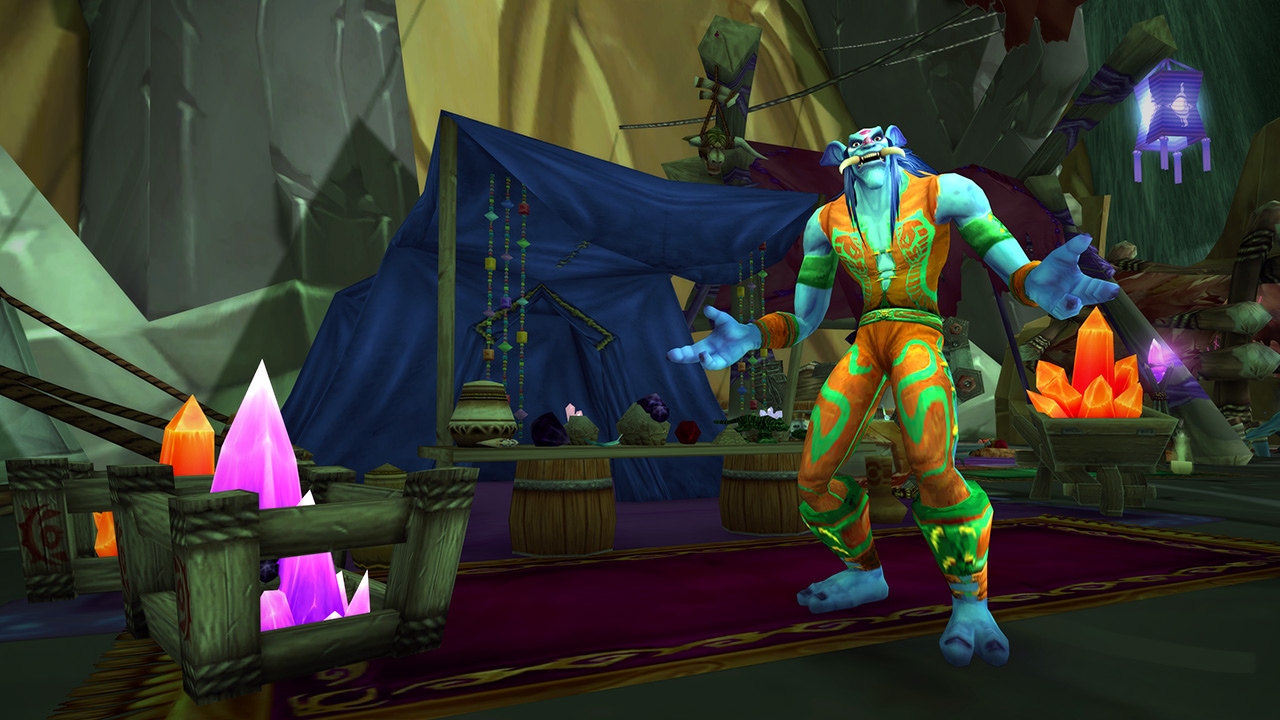
The intended clue was that the „true“ in the mount’s flavor text—“A true meeting of the minds.”—would connect you to the Talisman of True Treasure Tracking, a necklace sold by Griftah the shady salesman in the Lower City of Shattrath. He’s been in the game since he was added in The Burning Crusade selling questionable goods such as Polished Pendant of Edible Energy. In the end, we’re not sure if anyone connected “true” to the talisman or just noticed Griftah’s wares at random, perhaps noticing that some new objects existed on the table behind him.
Equipping the talisman causes four items on the table behind him to glow and is required for most of the remaining steps of the quest. The four glowing items are clues that each lead in separate directions, and the puzzle splits up into 4 parallel steps here. If you want to truly master this quest line, you can do all four branches. However, with some group coordination later in the process, you can get by with only doing one, or even none of these steps personally. One major goal with this design was to provide a variety of puzzles of different types, for different types of puzzle solvers. Word and lore lovers could work on the blue branch, while math lovers could work on the green branch, and so on—and together, they’d ultimately arrive at the complete solution.
The Blue Crystal Monacle
With the Talisman equipped, the letter on the table behind Griftah glows blue, and you can interact with it. Reading the letter will give you the first of many clues in this branch of the puzzle.
Each clue is a nonsense phrase, with some of the words being capitalized. The capitalized words make up an anagram that provides a hint on where to find the next clue. You must reach each letter in order.
- First Letter: The key Factor in successful Wasp Ignition is a solid Ad campaign.
Solution: The Wasp Ad Ignition Factor –> ANTICIPATORS OF DEATHWING
In northeastern Highmountain is a tribe of tauren known as the Prepfoots. They are preparing for Deathwing’s return (apparently unaware that the Cataclysm already occurred). On a table in one of their huts, you’ll find the next clue. - Second Letter: Of all of Gai’s cures for Nature, the most liberating is Death.
Solution: Gai’s Nature Of Death –> SEAT OF THE GUARDIAN
The next letter can be found on the chair in Medivh’s quarters in old Karazhan.
- Third Letter: I sat Dumbfounded, watching As the most Subtle Rat reached for the cheese a third time in under an hour.
Solution: I Dumbfounded As Subtle Rat –> MULTITUDES OF UNDEAD BARBS
This one refers to Razorfen Downs, a dungeon that mixes quillboar and the undead. On a table next to the last boss is your next letter. - Fourth Letter: Ms. Sin will accompany you down The longest Streets Of the underworld.
Solution: The Streets Of Ms. Sin –> NEST OF THE MISTRESS
Aviana, the mistress of the skies, has a shrine in northern Hyjal. Your next letter is on a table in one of the highest rooms in that tree. - Fifth Letter: The Elite champions will rule the World with the mightiest F.C.
Solution: The World Elite F.C.–> THE DERELICT FLOW
There is a dam that separates Crystalsong Forest from Icecrown. In the center of that dam, overlooking the Decrepit Flow, is your next letter. - Sixth Letter: Re: Codex of mastering Sine waves.
Solution: Re: Sine Codex –> OX RESIDENCE
The residence of the Niuzao, the Black Ox, is his shrine in western Townlong Steppes. There you’ll find your next letter. - Seventh Letter: Mice look so sad when they have a Cleft lip. Hoping you succeed, ~Ana
Solution: Mice Cleft Hoping Ana –> THE PINNACLE OF MAGIC
The Nexus in Coldaara is the center of arcane magic, and home of the Blue Dragonflight. At the very top of that, you’ll find the last clue.
There you’ll find a box, instead of a letter, containing the Blue Crystal Monocle, the final goal of this branch of the quest line—and your reward from Ms. Ana Graham.
The Green Crystal Monacle
With the Talisman equipped, the feather on the table behind Griftah glows green. The avian race of arakkoa make their home in Spires of Arak in Draenor. The main puzzle of this branch of the questline can be found at the end of their Skyreach dungeon.
There you’ll find a control panel, with a set of five buttons, arranged in a “+” shape.
- The middle button will spawn a grid of lights floating in the air, and a sun disc in the middle.
- Once started, the edge buttons will move the sun around the grid (Up/Right/Down/Left).
- Pressing the middle button again will reset the grid to its starting configuration.
- The lights are of different colors and change colors as the disc moves near them, in a consistent but unpredictable way.
There’s a „Basic“ Instructions scroll floating next the control panel that says:
What happened with this puzzle is rather interesting. Near the end of development on the puzzle, we noticed that our planned solution was potentially brute-forceable, and changed from an 8-digit answer to a 12-digit one.
Unfortunately, that change inadvertently left the solution susceptible to a different problem: educated guessing. Someone (correctly) guessed that the right side of the equation would be a multiple of the left side on each line, and that the result would be a number using just the digits 0–3. They found the first multiple that fit that criteria, and got the right answer, without knowing what the process to get there was. That’s super smart, and a great example of how players can outsmart our game designs in creative (but still totally legitimate) ways.
Here’s the intended solution, for those curious:
As some guessed, the „Basic“ Instructions title was a clue that it had to do with different base numbers. In particular, a concept we called baseMin, meaning to read the number as the smallest base possible. Each cell on the right is found by converting the cells to the left and above from baseMin to base10, and multiplying them.
So the missing numbers are 0000450, 0013572, 0042441, 0123453, and 102011032032. If the bottom left number hadn’t included a 9 digit, then their guess wouldn’t have worked.
You’ll note that this doesn’t mention the light grid or colors: those were entirely red herrings, meant to make the puzzle more difficult. Adding red herrings is something we toy with to make a puzzle harder, without complexifying the solution. For this particular puzzle, we went extremely heavy on red herrings to see how it would turn out. Unfortunately, that was never put to the test, due to the successful unintended alternate solution mentioned above.
Translating that last number from 0/1/2/3 to Up/Right/Down/Left gets you “RUDURRULDULD”. Enter that on the control pad and a box will appear with the Green Crystal Monocle.
The Yellow Crystal Monacle
With the Talisman equipped, the pyramid on the table behind Griftah glows yellow. Head to the biggest pyramid in Azeroth: the Halls of Origination in Uldum.
On the lowest level, below the central elevator, is an object which will create a giant grid of starry symbols and crystals in the room. There are four colors of symbol (red/green/blue/yellow), and three types of crystals:
- Angular Stellar Refractors will change the color of all symbols in a horizontal/vertical line with them, until they hit an edge or another refractor.
- Jagged Stellar Refractors will change the color of all symbols in a diagonal line with them, until they hit an edge or another refractor.
- Round Stellar Refractors will chance the color of all symbols that are adjacent to them.
- Changing a symbol’s color will advance it from red->green->blue->yellow->back to red.
The solution is to change all symbols to the same color (it doesn’t matter which). And unlike the other puzzles, this one is randomly generated, so everyone’s solution is different (though it may be done as a group if you wish). One big tip that may save you a lot of time: Look for a symbol that can’t be changed by any crystal. That tells you which symbol to change all the others to.
Upon completion, a box will appear that contains the Yellow Crystal Monocle.
The Red Crystal Monacle
With the Talisman equipped, the fish (perhaps a herring?) on the table behind Griftah glows red. Head to the fishiest zone around, Vashj’ir. There you’ll find nine fishy creatures that have formed their own underwater economy, offering various commodities for trade. Bridging the gap between their economy and ours, Sir Finley Mrrgglton will convert your gold to Seashells, a common basic commodity in their economy. He also sells the Red Crystal Monocle, which is the end goal of this step. One wrinkle here to add to the challenge is that you must be efficient about your trade routes; the commodities will expire after short durations!
To solve this, you’ll need to trade the various commodities between the various vendors. There are many ways to do this. Here’s one potential solution:
- To solve this, you’ll need to trade the various commodities between the various vendors. There are many ways to do this. Here’s one potential solution:
- Symbiotic Plankton
- Buy 80 Seashells from Sir Finley Mrrgglton.
- Buy 2 Giant Giant Toenail Clippings from Gloomy Bluefin.
- Buy 4 Makrura Eyes from Little Carp.
- Buy 1 Accidentally-Severed Seahorse Fin from Volatile Violetscale.
- Buy 3 Shiny Sea Serpent Scales from Crimson Angerfish.
- Buy 40 Symbiotic Plankton from Manta Stargazer. (30 min. timer)
- Glittergill Glitter
- Buy 500 Seashells from Sir Finley Mrrgglton.
- Buy 100 Cavity-Free Great Shark Teeth from Volatile Violetscale.
- Buy 50 Razoreel Larva from Manta Stargazer.
- Buy 250 Well-Fed Doctor Fish from Lil‘ Whaley.
- Buy 10 Freshly Molted Crab Skins from Gloomy Bluefin.
- Buy 50 Glittergill Glitter from Ol‘ Fishbreath. (30 min. timer)
- Buy 5 Scintillating Murloc Skin Lotions from Sir Finley Mrrgglton. (1 hour timer)
- Captured Cavitation Bubble
- Buy 1,500 Seashells from Sir Finley Mrrgglton.
- Buy 300 Very Pretty Coral from Lil‘ Whaley.
- Buy 100 Iridescent Shimmerray Skins from Ol‘ Fishbreath.
- Buy 20 Luxurious Luxscale Scales from Crimson Angerfish.
- Buy 5 Captured Cavitation Bubbles from The Blackfish. (30min timer)
- Potent Gastropod Gloop
- Buy 300 Seashells from Sir Finley Mrrgglton.
- Buy 30 Vantus Black Squid Ink from Ol‘ Fishbreath.
- Buy 30 Super Slick Eel Slime from The Blackfish.
- Buy 3 Rock-Encrusted Whelk Shells from Volatile Violetscale.
- Buy 6 Potent Gastropod Gloop from Little Carp. (30min)
- Buy Red Crystal Monocle from Sir Finley Mrrgglton. (Net cost was 2,380 gold.)
Wild Withered
The four crystal monocles all have flavor text on them, providing a clue on where to go next:
- „Inscribed around the edge of the monocle in remarkably tiny lettering: <string of 10 letters>“. The letters on each monocle are:
- Green: N R V Q Z J S M G Y
- Red: P O T Y A B U V F X
- Yellow: S K M C U F L N J O
- Blue: Q P C X K B Z H A G
- Taken all together, the four strings of letters form two complete sets of the English alphabet, minus the following letters: DDEEHIILRTWW.
That’s an anagram for WILD WITHERED, which is your clue to head to Suramar and find withered in the wilds.
Interestingly, the withered were the first thing that the community found, and days were spent experimenting on them to no avail before the actual start of the puzzle was found. This also provided further confusion down the line, because they had the withered already, and thought the monocle inscriptions were something else that they needed to solve.
Group Up!
The remainder of the quest line to earn the Hivemind mount must be completed as a group. You’ll need one person with each color monocle equipped. The fifth person doesn’t need a monocle equipped.
Send the four players wearing monacles to the withered that matches the color of their monacle, located in Suramar in the Broken Isles:
- Rikei (Red) is located to the east of Suramar City.
- Blom’an (Blue) is located north of Suramar City near Tel’anor.
- Giluzui (Green) is located near Falanaar.
- Yorilan (Yellow) is located south of the western most harbor in Suramar City.
With the correct color monocle equipped, the withered are attackable. However, when reduced to 1 health, they don’t die; they instead go temporarily immune, draw power from somewhere in the city for 6 seconds, then heal to full and resume attacking you.
That’s where the fifth person in your group comes in. In a house in upper Suramar, at roughly the center point between the four withered, is a small room that is blocked off by four beams of those same colors. While each withered is drawing power, the coordinating color beam deactivates. When all four beams are simultaneously deactivated, the fifth person can pass through the door.
Within that room, you’ll find a small cat toy on the ground, just begging to be picked up. However, when you try to pick it up, it’ll zap you, dealing some damage and teleporting you outside. The description of the spell you’re hit with indicates that you triggered the defense of this magical cat toy.
Mana Kittens
This portion of the hunt for the mount stumped the secret hunters in the community for quite a while. Players spent a lot of time working on trying to find ways to successfully pick up the cat toy, testing theory after theory for how to either not trigger the defenses, or to make themselves immune to the effect. In fact, the answer was much sneakier: you were intended to get zapped by the cat toy, and the amount of damage it did to you was quite significant: a consistent 5-digit code, specifically for your group of 5 people.
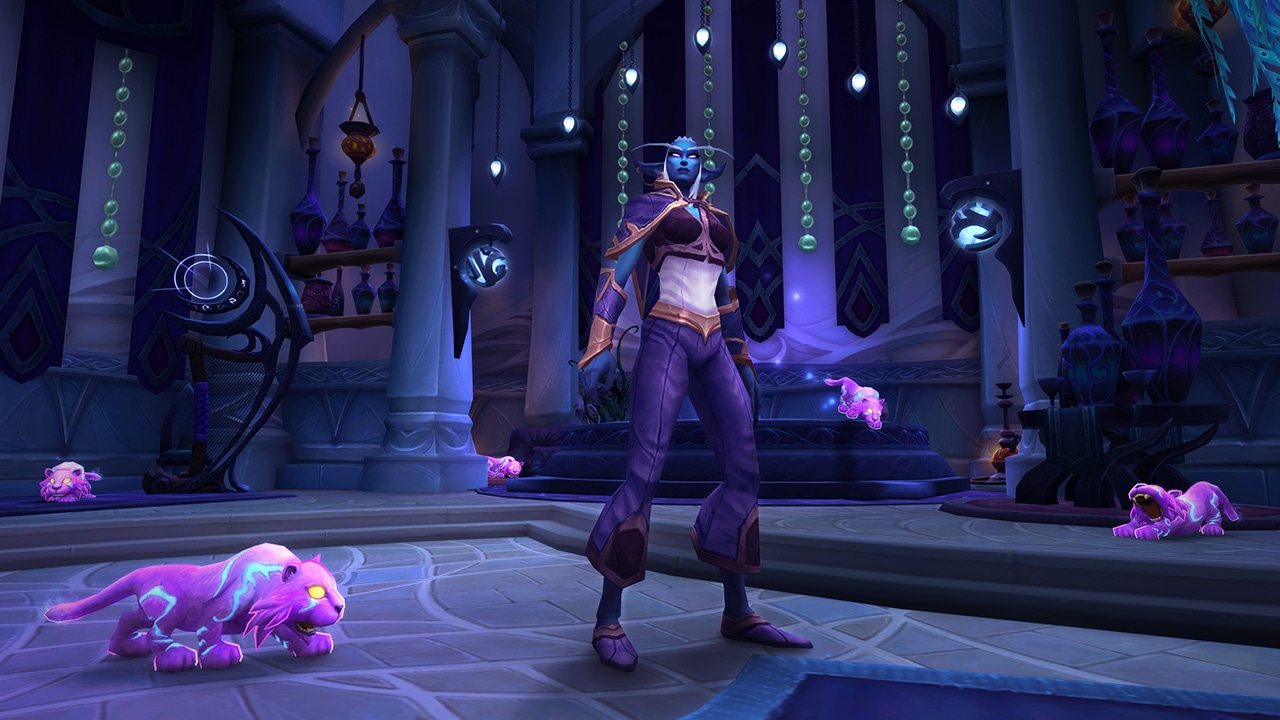
Separately from all of this, a new Nightborne was added to the Court of Stars dungeon in Battle for Azeroth—Lady Chaton—along with her five pet mana kittens. You can pet the kittens, giving them a stack of Purring. If you stop petting for them for too long, however, or reach 10 stacks of Purring, they’ll become angry, scratch you, and run off. (Typical cats.) Speaking to Lady Chaton, she’d share with you a long-winded story about her kittens and how much she wants to pet every cat. She really likes cats. The key thing to take away from her story is the order she got the cats in.
Watching the community solve this puzzle was particularly interesting. We’d occasionally see someone say something like „Hey, I consistently get hit for 12345 damage by the cat toy. Maybe that’s a code we need to use?„, and later someone else say something like „Hey, we know an order for the cats, I wonder if we need to give them a 5-digit code through Purring stacks?„. After a long afternoon of everyone wracking their brains over these two seemingly separate problems, some ingenious players connected the dots.
As crazy as it sounds, that’s the next step. Once you’ve found the 5-digit code for your group (add zeroes to the front if you need to; for example, “1234” means “01234”), go visit the mana kittens in the Court of Stars. Cooperatively enter those five digits on the cats, in the order that Lady Chaton got the cats: Mrs. Fluffymuffins > Shadow > Mew > Ash > Bella.
Once you correctly enter the code for your group, the mana kittens will leap to their pool, do a dance, and summon a portal that will take you to the next puzzle.
Phaseshifting Platforms
The next puzzle is a maze of sorts, taking place on floating platforms over a chasm.
It starts with one platform active. Each platform can be ridden by one player and activates 0–3 other platforms. Players can hop from platform to platform. A platform won’t deactivate while there’s someone on it, but as soon as you hop off it, if nothing is activating it, it’ll disappear. Therefore, you must work as a group to progress throughout this maze, taking turns moving from platform to platform.
There are multiple possible solutions to this maze, but here is one:

| PlayersNamed A,B,C,D,E |
E94 | E61 | D36 | C31 |
| A95 | C83 | E62 | A38 | B11 |
| B94 | C82 | B54 | E34 | A18 |
| A85 | B73 | B53 | B23 | C21 |
| B84 | E100 | E61 | B22 | C22 |
| C95 | E97 | E51 | E24 | C12 |
| C94 | A88 | B43 | D26 | A0 |
| B83 | A78 | D47 | C56 | B0 |
| A86 | D76 | B33 | A39 | C0 |
| A87 | E87 | D37 | A29 | D0 |
| D95 | D66 | C100 | B21 | E0 |
| D85 | D56 | C97 | E14 | |
| D75 | D55 | C87 | D27 | |
| B82 | B63 | C77 | A28 | |
| B72 | D45 | C67 | D17 | |
| E95 | A68 | C57 | C100 | |
| E85 | D46 | A59 | C91 | |
| C84 | B64 | A58 | C81 | |
| E95 | E100 | E41 | C71 | |
| E91 | A48 | C61 | ||
| E81 | E42 | C51 | ||
| A69 | E43 | E15 | ||
| E71 | E44 | C41 |
Once all five members of your group reach the door on the other side, it will open, letting you proceed.
Lightlocked Platform
For the final puzzle, your group must get across a field of magical energy, using a platform that travels back and forth across it. If you step in the field, you’ll be teleported back to your side of the field.
While riding the platform, it will stop in the middle of the field, analyze the current group of riders, and let them pass if it approves. If not, it will dump them in the field, and you’ll have to try again.
This is a variant of the classic river crossing puzzle. There are three roles which the five people are randomly (and secretly) assigned to—one driver, two adults, and two children. The platform must always have a driver, and is big enough to hold one additional adult, or two additional children, but not two adults. It also can’t go across with only a driver.
Therefore, valid combinations that are allowed to cross are driver + adult, driver + child, and driver + child + child. Experiment until you can find who your driver is, then start using them to ferry people back and forth.
Once you’ve found out your roles, here’s one possible solution:
| Starting position | [DAACC ] |
|---|---|
| DCC to exit side | [AA DCC] |
| DC to start side | [AADC C] |
| DA to exit side | [AC DAC] |
| DC to start side | [ACDC A] |
| DCC to exit side | [A DACC] |
| DC to start side | [DAC AC] |
| DA to exit side | [C DAAC] |
| DC to start side | [DCC AA] |
| DCC to exit side | [ DAACC] |
Once all five members of your group reach the door on the other side, it will open, letting you proceed.
The Hivemind
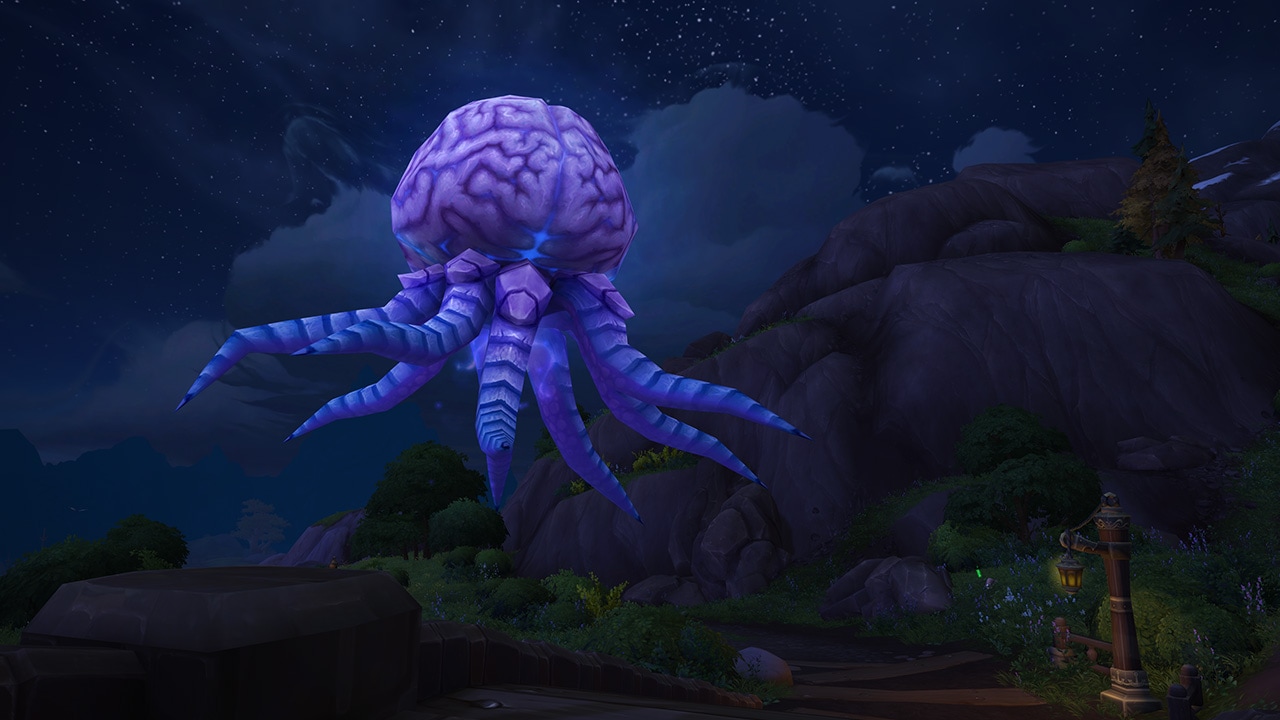
This brings you to the end of your journey. In the next room, you’ll find the Hivemind, along with five spots to stand and channel on it, to form your Hivemind group. It was intentional that the group section be consistently and easily repeatable once the puzzles were solved, so that people could reattune as necessary without a frustrating amount of work (it takes about 15 minutes if you know what you’re doing and have the monocles already).
This was an awesome secret hunt, and congratulations to those who worked to solve our little puzzles. We hope you enjoyed this little peek behind the development curtain!


